How to clear DNS cache on Chrome. Tips on using chrome://net-internals/#dns

Chrome, like all the other web browsers, stores DNS (domain name information) in a cache in order to speed up websites' loading times. This cache can sometimes become outdated or corrupted, which causes issues with website access.
Sometimes, clearing the DNS cache resolves these issues. Here's how you can do in in Chrome using the 'chrome://net-internals/#dns' page.
Step 1: Open the 'chrome://net-internals/#dns' page
To access the 'chrome://net-internals/#dns' page, type it into the address bar of your Chrome browser and press enter. This will bring up the page where you can clear the DNS cache.
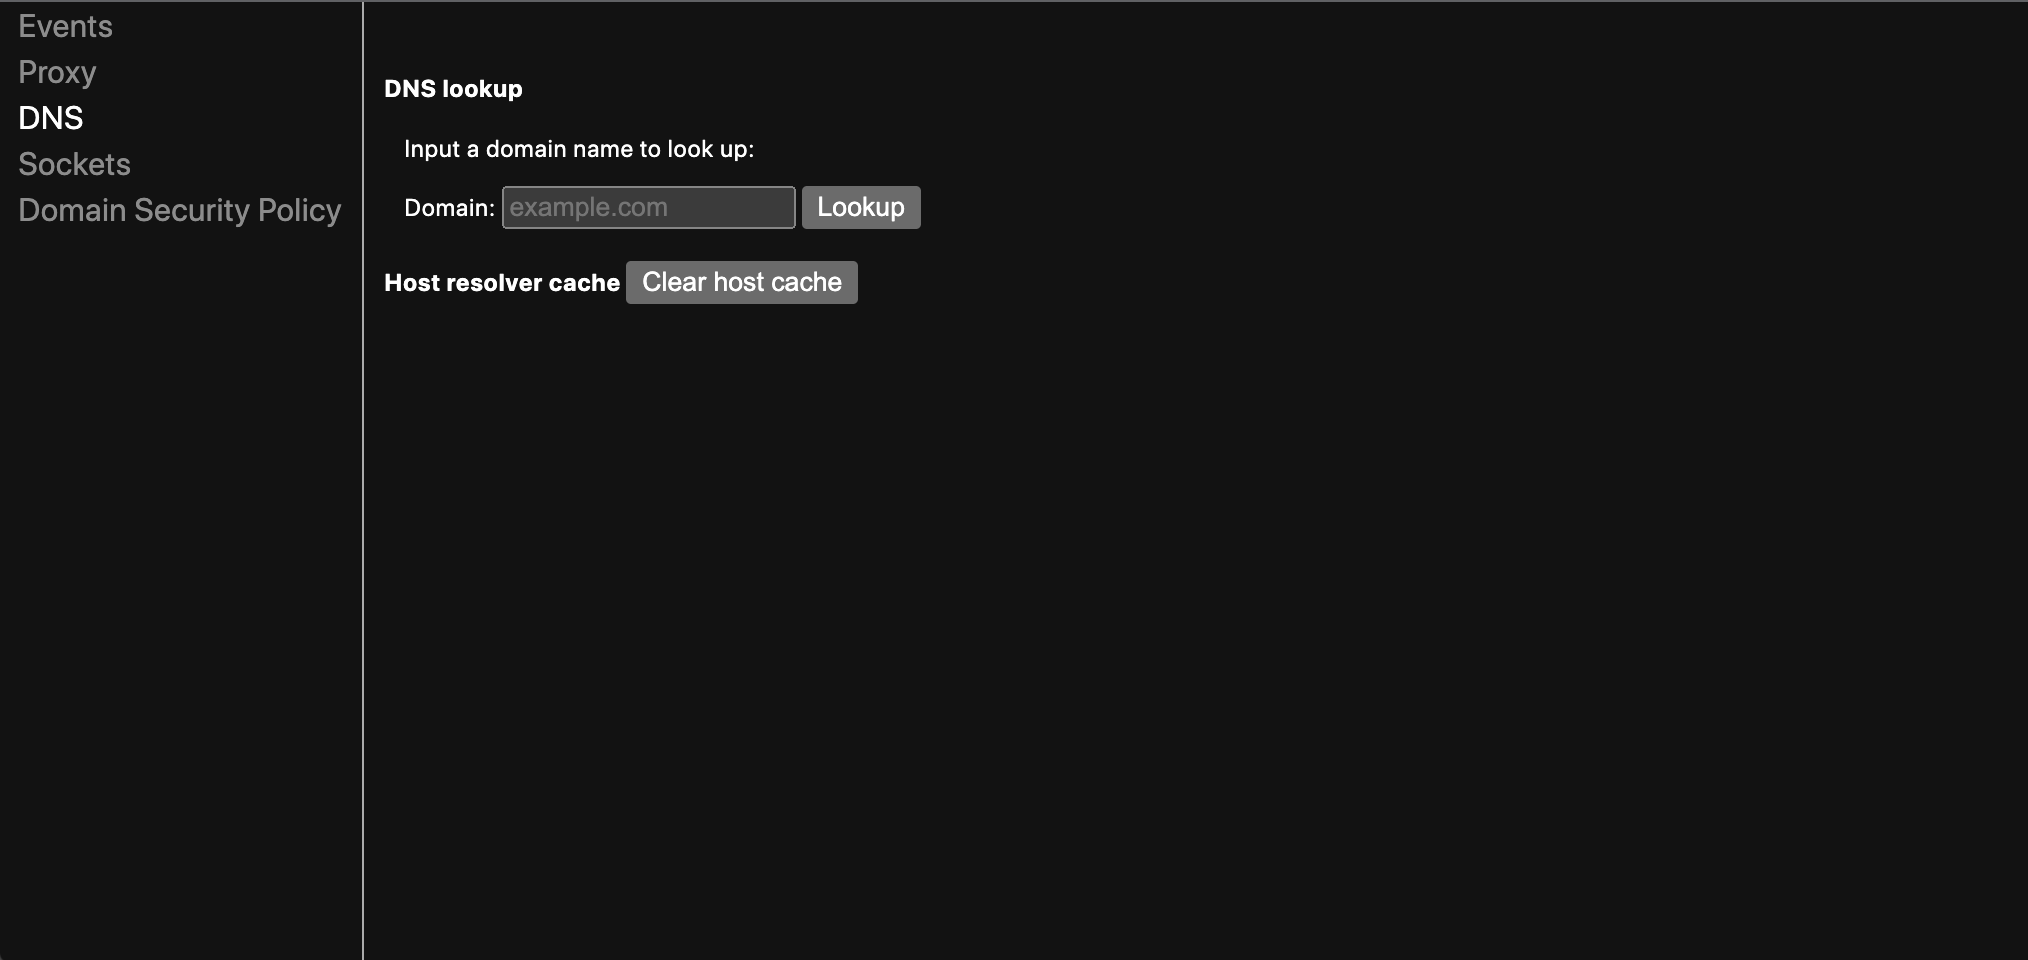
Step 2: Clear the DNS cache
Once you're on the 'chrome://net-internals/#dns' page, click the "Clear host cache" button. This will immediately clear the DNS cache for your Chrome browser.
Step 3: Verify that the DNS cache is cleared
To verify that the DNS cache has been cleared, you can try accessing the website that was giving you issues before. If the site now loads correctly, then the DNS cache has been successfully cleared.
When should you clear DNS cache on Chrome?
Here are four situations when you should clear your DNS cache using chrome://net-internals/#dns:
- Websites are not loading or they're taking a long time to load
- Your browser's pages are not displaying correctly or are missing content
- You receive error messages related to DNS, such as: "DNS_PROBE_FINISHED_NXDOMAIN" or "ERR_NAME_NOT_RESOLVED"
- You're unable to access certain websites or web services
By accessing "chrome://net-internals/#dns" you'll be able to clear your browser DNS cache and hopefully fix any issues you're running into.
How Jam can help you log & fix issues faster
Clearing the DNS cache can fix many common web browsing issues, but we all know that often, issues persist. The good news is you can save yourself a lot of time debugging tickets by asking your team to try logging issues with Jam’s free bug reporting browser extension. Jam makes it easy for anyone to create developer-ready bug reports by auto-including console logs, network requests, and steps to reproduce the issue along with the screen recording.
Replay bugs after they happen. Never write reproduction steps again.Jam
With Jam, you can capture detailed debug data just by recording your screen. Jam packages it all up into a link you can share, or a ticket in your issue tracker. Now everyone can log comprehensive bug reports and developers can fix bugs faster without having to follow up.