
Creating a token
1
Open Settings → MCP
Go to Settings → MCP.
2
Navigate to Personal Access Tokens
Scroll to the Personal Access Tokens section and click Create token.
3
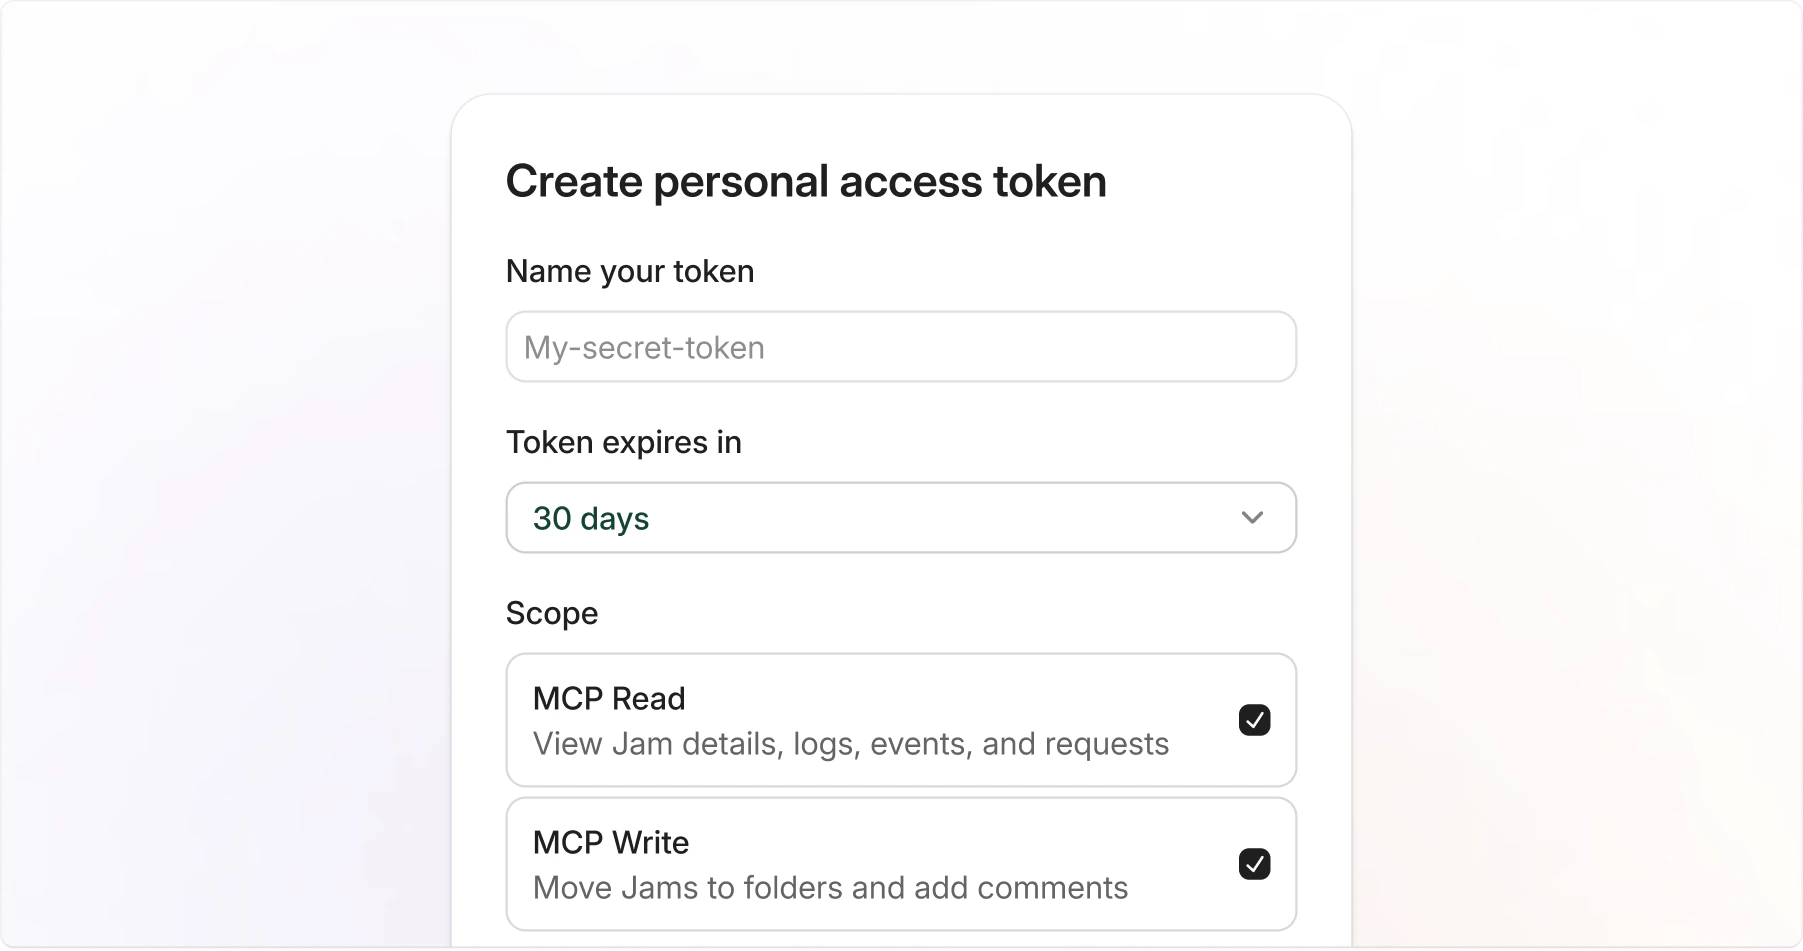
Fill in the token details
Provide the following:
- Name: A label to identify the token, such as “Cursor” or “Claude Code”.
- Expiration: How long the token is valid: 7 days, 30 days, 90 days, or 1 year.
- Scopes: The permissions the token needs. See the Scopes section below.
4
Create and copy the token
Click Create, then copy your token immediately. You won’t be able to see it again.
Token format
Jam PATs follow a recognizable format:jam_pat_ prefix makes it easy to identify Jam tokens in your configuration and helps secret scanners detect accidental exposure.
Using a token with MCP clients
Use your PAT as a Bearer token when configuring your MCP client. Replacejam_pat_... with your actual token.
- Claude Code
- Cursor
- VS Code / Windsurf
Scopes
Scopes control what a token can do. Select only the scopes you need.
You must select at least one scope when creating a token.
Managing tokens
Viewing your tokens
Go to Settings → MCP to see all personal access tokens for the current workspace. The list shows each token’s name, scopes, last used date, and expiration status.Revoking a token
1
Find the token
Go to Settings → MCP and locate the token you want to revoke.
2
Open the token menu
Click the … menu on the right side of the token row.
3
Revoke the token
Select Revoke token and confirm the revocation.
Expiration
All tokens have a mandatory expiration date. Choose the expiration period that matches your use case:
Expired tokens stop working automatically. When a token expires, create a new one and update your MCP client configuration.
Security best practices
- Use short-lived tokens: Choose the shortest expiration that works for your use case.
- Limit scopes: Grant the permissions the token needs.
- Never commit tokens: Store tokens in environment variables or your MCP client’s secure credential storage, not in files checked into version control.
- One token per client: Create separate tokens for each MCP client so you can revoke them independently.
- Revoke immediately if compromised: If a token may have been exposed, revoke it right away and create a replacement.