

Jam for Mac is included on every plan. Until the end of 2026, Mac Jams do not count toward your monthly Jam quota.
Install Jam for Mac
1
Download the app
Go to jam.dev/download. The download starts automatically.
2
Move Jam to Applications
Open 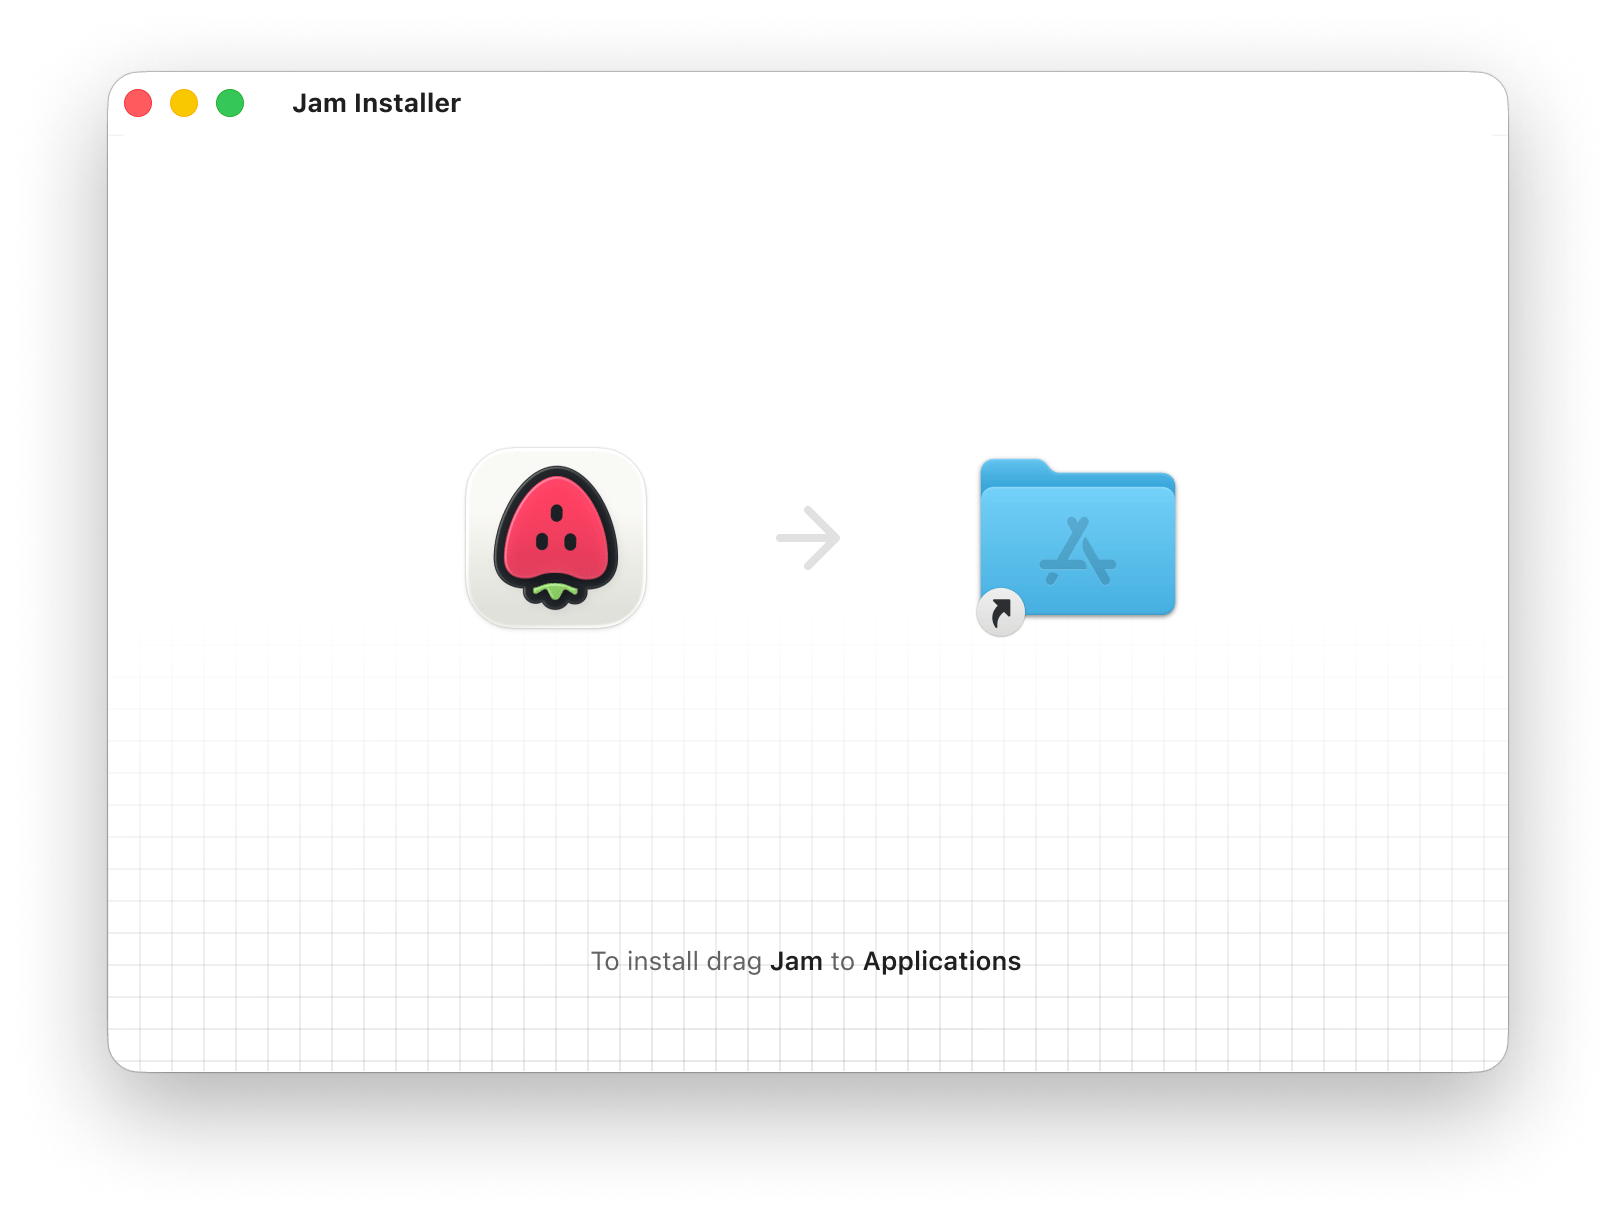
Jam.dmg and drag it into the Applications folder.3
Open Jam and sign in
Open Jam from Applications. Jam opens your browser to sign in or create an account, then returns you to the app.
Grant permissions
On first run, Jam asks for the macOS permissions it uses:- Screen Recording is required to record.
- Microphone is optional. Grant it to narrate your recordings.
- Camera is optional. Grant it to add your camera bubble.
macOS applies a new Screen Recording permission only after the app restarts. If Jam still cannot record after you turn the permission on, quit Jam with Cmd + Q and open it again.
Find Jam in the menu bar
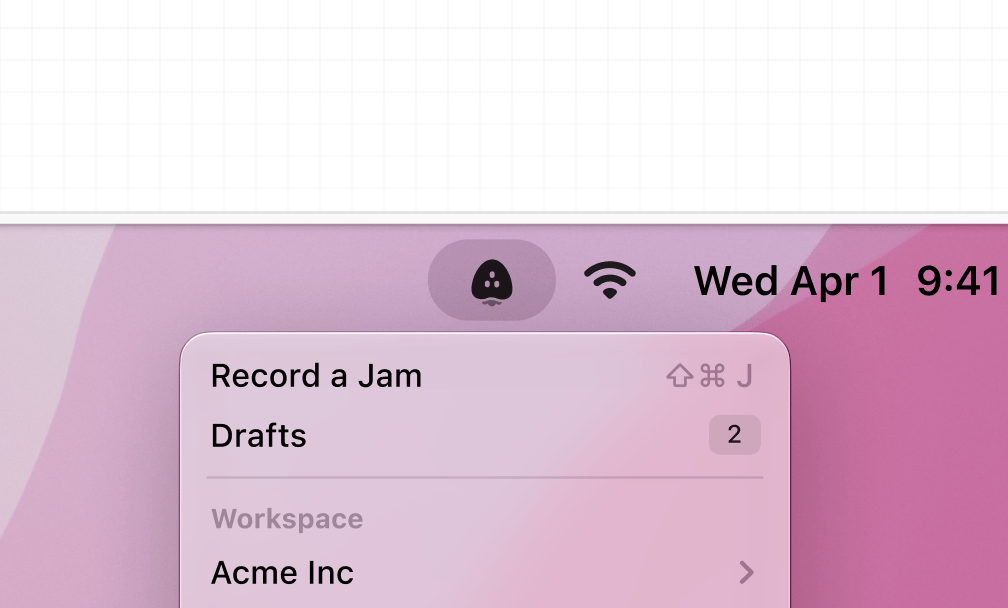
- Record a Jam starts a recording. The shortcut is Cmd + Shift + J.
- Drafts opens recordings you have not created a Jam from yet.
- Workspace switches the workspace new Jams go to, if you belong to more than one.
- Browser Extension shows whether the extension is connected.
- Open at Login keeps Jam ready every time you start your Mac.
- Check for Updates… installs the latest version.
Record a Jam
1
Start Jam
Press Cmd + Shift + J, or choose Record a Jam from the menu bar. The recording toolbar appears.
2
Choose what to record
Pick Record Screen, Record Window, or Record Area. Jam highlights the screen or window it will capture. For an area, drag the handles to set the region.
3
Set up your microphone and camera
Use the microphone and camera menus on the toolbar to pick a device or turn either one off. The camera shows as a floating bubble you can move anywhere on screen.
4
Record
Click the record button. While recording, the toolbar shows the elapsed time and lets you pause, resume, or restart from the beginning.
5
Stop
Click Stop on the toolbar, or choose Stop Recording from the menu bar. The draft editor opens.
Recordings can run for up to 10 minutes on the Free plan and up to 30 minutes on the Team and Enterprise plans.
Edit and create the Jam
When you stop, the draft editor opens with your recording:- Trim the start and end using the timeline under the video.
- Add a title and description. If you narrated the recording, Jam can fill these in for you. See AI titles and descriptions.
- Pick a folder from the toolbar if you want the Jam in a specific folder.
- Click Create Jam to upload.
Drafts
Every recording is saved on your Mac before anything is uploaded, so a recording is never lost if you close the editor or the app.- Close the editor and choose Save Draft to come back later, or Delete Draft to discard the recording.
- Open Drafts from the menu bar to see saved recordings and continue any of them.
Where your Jams go
Mac Jams land in the same workspace as your browser Jams. Switch the workspace from the menu bar before you record, and pick a folder in the draft editor. In the dashboard, filter by Mac App to see only Jams recorded with the app.Console logs and network requests
A Mac recording includes console logs and network requests from every browser and Electron app connected to Jam.- Window recording: logs from that window, whether it’s a browser or an Electron app.
- Screen recording: logs from every connected browser, on any screen.
- Area recording: no logs.
Screen recordings do not include logs from Electron apps.
Chromium browsers
Install the Chrome extension in the browser you record. It works in every supported Chromium browser (see browser support).Safari
The Safari extension ships inside Jam for Mac. Safari does not let Jam turn it on for you, so you’ll need to set it up first.1
Open the Safari extension settings
Hover over a Safari window and click Enable Logs for Safari. Safari opens its Extensions settings.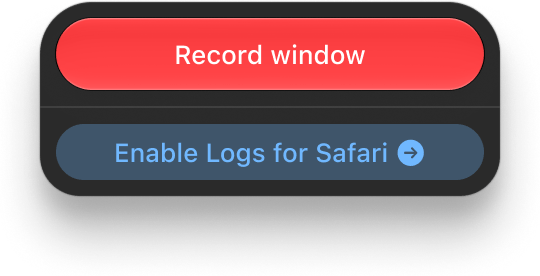
2
Turn the extension on
Check the box next to Jam for Safari.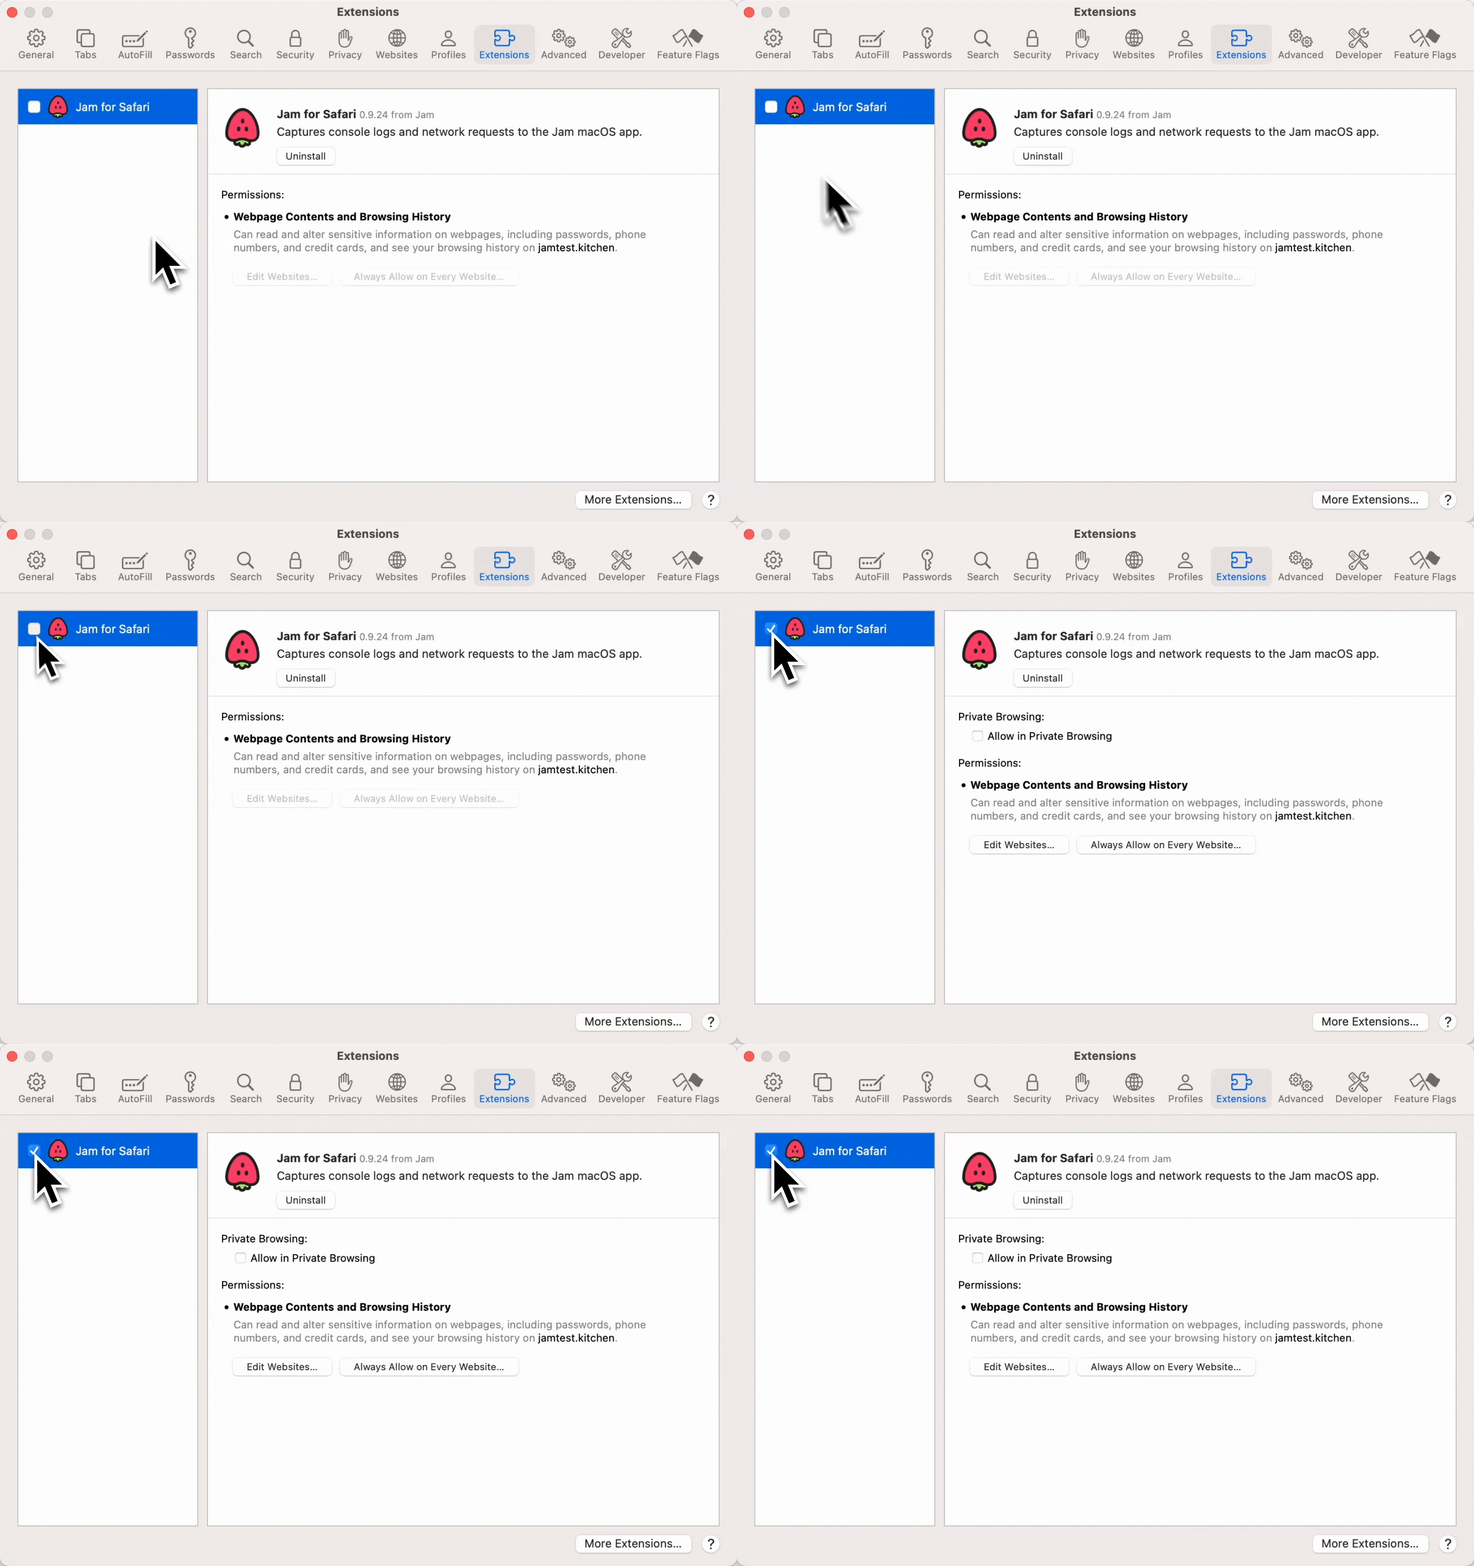
3
Allow Jam on the sites you record
Under Permissions, click Always Allow on Every Website, or Edit Websites to allow only specific sites. Safari does not let the extension read a site until you allow it.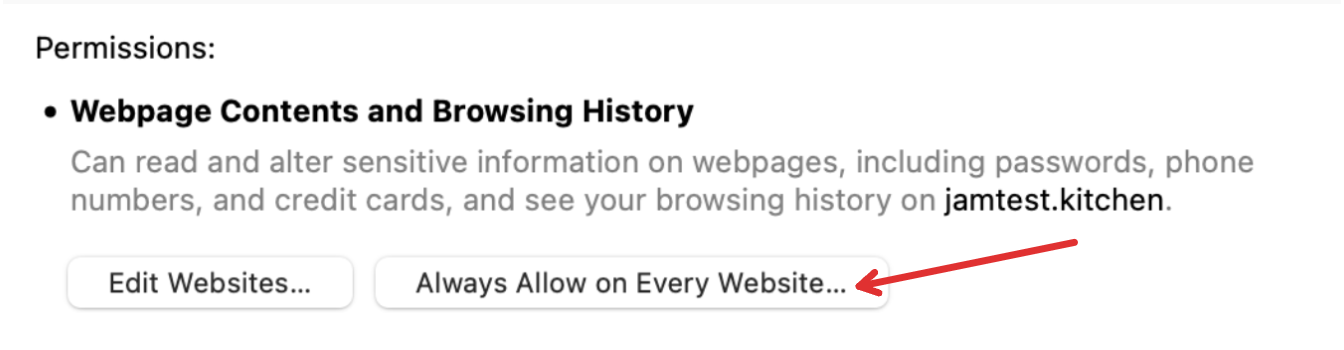
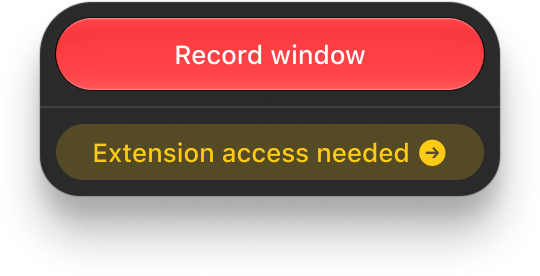
Electron apps
If you’re developing an Electron app, Jam for Mac can capture its console logs and network requests. Restart the app from Jam once per session so it can send logs.1
Restart the app
Hover over the app’s window and click Restart to capture logs. Jam relaunches the app in the same place and keeps the window selected.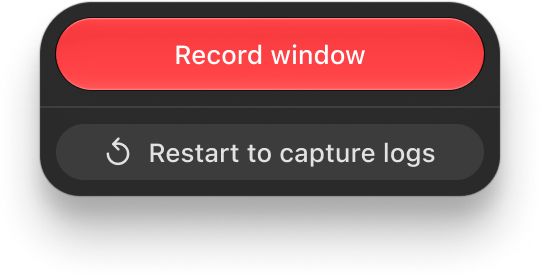
2
Record
When the overlay shows that logs are enabled, click Record window.
AI titles and descriptions
Jam for Mac writes the title and description from what you say while recording. Generation runs on your Mac with Apple Intelligence, so nothing leaves your device for this step. It needs:- macOS 26 or later.
- Apple Intelligence turned on in System Settings → Apple Intelligence & Siri.
- A narrated recording. A silent recording has no transcript to summarize.
- Your Mac’s system language set to a language Apple Intelligence supports, and the same language in the app.
Updates
Jam checks for updates in the background. When one is ready, the menu bar shows Update Available…. Choose it to install. Jam quits and reopens, and it never installs an update while you are recording. You can also choose Check for Updates… at any time.FAQs
Do I need the extension to use the Mac app?
Do I need the extension to use the Mac app?
No. The app works on its own. Console logs and network requests come from a connected browser extension, in Chrome or Safari, or from an Electron app you restart from Jam. See Console logs and network requests.
Could the extension already record my desktop? Why install both?
Could the extension already record my desktop? Why install both?
Yes, and it still can. The Mac app adds a global shortcut, area recording, a camera bubble, longer recordings, and device info, and it works outside the browser.
Do Mac Jams count toward my monthly Jams?
Do Mac Jams count toward my monthly Jams?
Not until the end of 2026. Mac Jams are free of the monthly quota during that time, so only your browser Jams count.
Can I change the keyboard shortcut?
Can I change the keyboard shortcut?
Not yet. The shortcut is Option + J. See keyboard shortcuts for the extension’s shortcuts.
Where are drafts stored?
Where are drafts stored?
On your Mac, in the app’s own storage. Open Drafts from the menu bar to reach them. Drafts are not synced to the dashboard until you create the Jam.